Share Files Between Android and Windows Using Nearby Share (2023)
Google has finally made Nearby Sharing available for Windows Computers, more than a year after the search engine giant first announced it at CES 2022. Although it's still in beta, Nearby Sharing performed beautifully during my testing on my Windows 11 Laptop. With Nearby Share, you can now share files freely across Android and Windows, and the transfer time is also quite fast. To transfer files between devices and platforms, you are no longer required to use third-party solutions. Now, follow our thorough tutorial below to use Android's Nearby Sharing feature on a Windows PC.
Tips Before Using Nearby Sharing on a Windows Computer
1. Your Windows computer must support Bluetooth and Wi-Fi in order to use Nearby Sharing. Besides this, Wi-Fi and Bluetooth both need to be switched on.
2. When enabling Nearby Share on Android, ensure that both devices are connected to the same Wi-Fi network for faster transfer speeds (preferably on the same Wi-Fi channel as well). If not, Bluetooth will be used by default, which delivers sluggish transfer speeds.
3. Only the 64-bit x86 versions of Windows 11 and 10 support Nearby Sharing. Currently, ARM-based PCs are not supported. Besides this, a device running Android 6.0 or later is required.
4. With the exception of a few countries, Nearby Sharing on Windows is accessible worldwide in most locations. The list of nations that are not supported is available here.
5. The two devices must be close to one another—within 5 metres, or 16 feet—for Nearby Sharing to function successfully.
How to Configure Windows' Nearby Sharing on Your Computer
1. First, download the Nearby Sharing app for Windows from this page by clicking "Get Started." this link
2. Setup file should then be launched and installed.
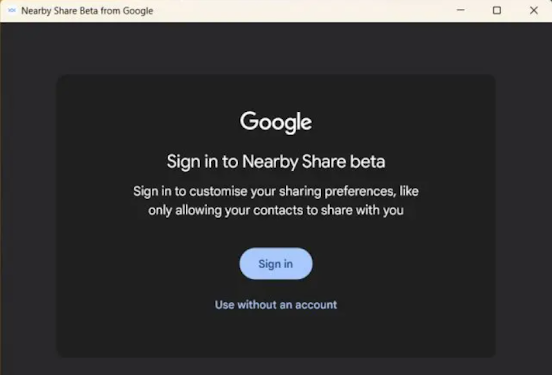
3. After installing Nearby Share, you will be prompted to "Sign in" using your Google account. By the way, Nearby Sharing is also usable without a Google account.
4. After you click the "Sign in" button, a browser window will open where you must select your account and log in.
5. After logging in, return to the Nearby Share app. Choose a moniker for your PC here that will be seen by others. Additionally, it's okay because only "Contacts" can exchange files with you by default. In the end, select "Done" here.
6. Select "Receive from everyone" if you're using Nearby Share without a Google account. For a short while, this will make your Windows computer visible to others. Your computer will eventually become concealed. Keep in mind that you will need to personally approve the requests.
Use Nearby Share on a PC Without Problem
These are the procedures you must take in order to use Nearby Share on a Windows computer. It functioned flawlessly every time I tested it, which is fantastic. I appreciate that Google gave Windows 11's context menu a Nearby Share choice. That's all we have to say, though. Follow our compiled list if you're searching for the best free and open-source software for Windows 11. Visit our linked guide to learn how to use the new Intel Unison app on Windows 11, which displays your photos and messages, allows you to accept and make calls and move files between Android and Windows devices. Finally, let us know in the comments area below if you have any questions.
Tags
android to laptop
android to windows sharing.
mobile to laptop
Share Files Between Android and Windows Using Nearby Share (2023)
Windows share


Can we use it android to macbook
ReplyDeletePls share iPhone to windows steps
ReplyDelete